
Have you ever thought about handling mold cleanup on your own? It may seem challenging, but this guide shows you simple ways to fix even stubborn mold.
First, learn how to spot the signs of moisture in your home. Next, follow safe cleanup steps that protect you and your family. Each step is clear, so you know exactly what to do, from finding the source of the moisture to cleaning up the affected area.
By following this step-by-step plan, you can remove mold and help stop it from coming back. You'll soon see that keeping your home safe and healthy can be easier than you expected.
Comprehensive Step-by-Step Process for DIY Mold Remediation
Start your mold cleanup with a simple plan and a focus on safety. First, check the area to see if it is a small job (10 sq ft or less) that you can handle on your own. This guide will walk you through each important step to remove the mold and help keep it from coming back.
Here is what to do:
- Find the source of the moisture that is making the mold grow.
- Remove or secure any items that have been affected to stop the mold from spreading.
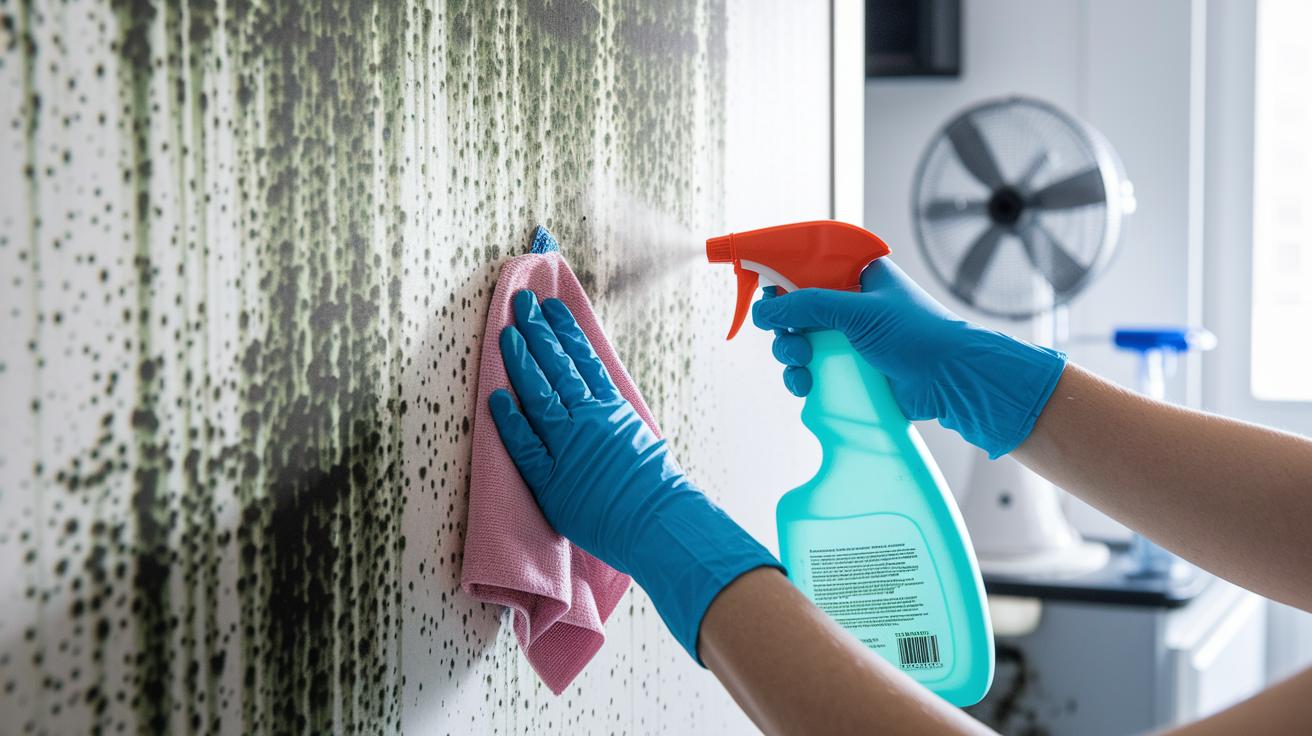
- Evenly spray a mold-killing solution on the surfaces that show mold.
- Scrub the surfaces well with a stiff brush to remove the mold.
- Rinse the area and dry it completely using fans or a dehumidifier (a tool that removes excess moisture).
- Put all waste in plastic bags and seal them tightly for safe disposal.
- Set up steps to prevent mold from growing in the future and keep the area dry.
Each step builds on the ones before it. By following these clear steps, you can remove the mold and protect your home over the long term. This method reduces health risks and limits damage, making your home a safer place to live.
Essential Safety Measures & Protective Gear for DIY Mold Remediation
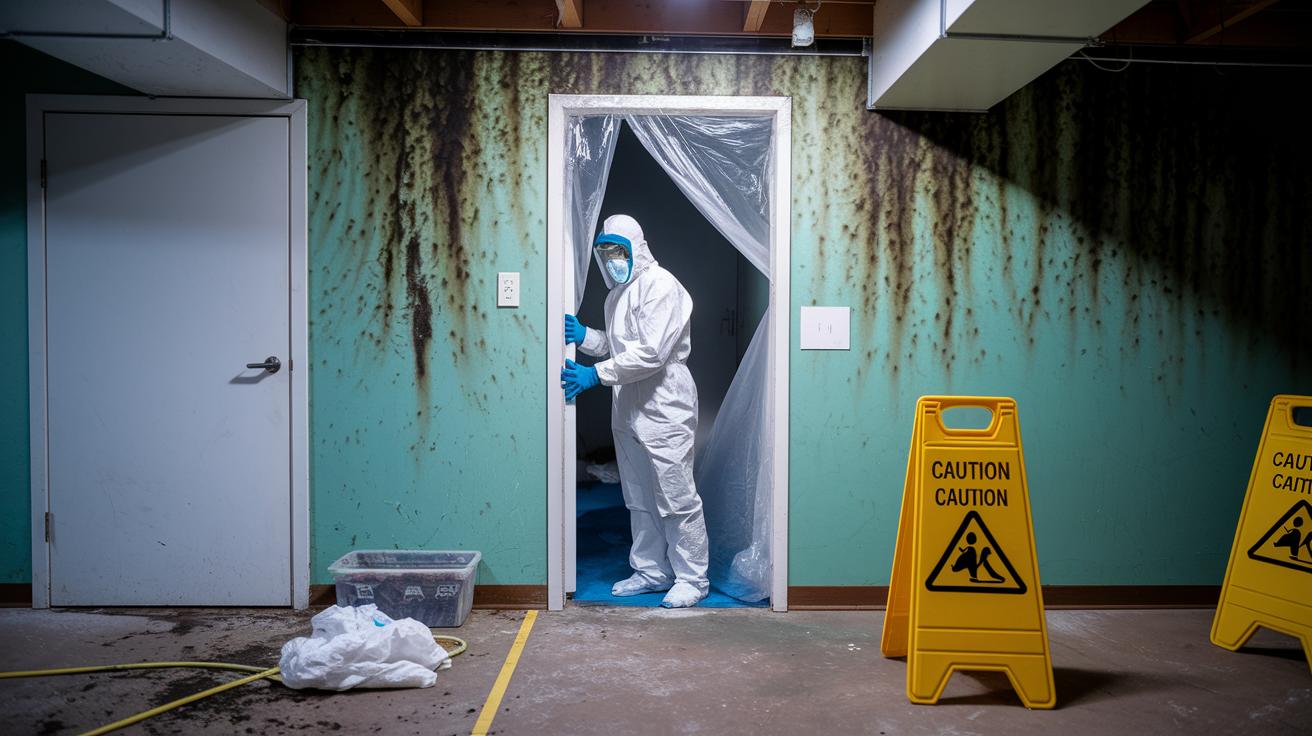
Mold cleanup can be very dangerous to your health. The Centers for Disease Control and Prevention (CDC) warns that people with asthma, COPD (chronic lung condition), or weak immune systems should not try to handle mold cleanup on their own. Mold spores and debris can make breathing even harder and lead to other health issues. Please be very cautious before you begin.
Before you get started, it is important to keep the work area contained. Use plastic sheeting and tape to block off doors and windows. This helps keep mold spores from drifting into other parts of your home. Isolating the area protects both your family and the overall indoor environment.
Wearing the proper protective gear is key during mold cleanup. Follow these steps:
- Put on an N95 respirator. This mask filters out harmful particles.
- Wear sealed goggles to shield your eyes from airborne spores.
- Use rubber gloves and old clothing to keep your skin safe and avoid contamination.
- Have extra plastic sheeting and tape on hand to create barriers around your workspace.
- N95 respirator
- Sealed goggles
- Rubber gloves
- Old clothing
- Plastic sheeting and tape for containment
Selecting Effective Cleaning Solutions & DIY Formulations for Mold Remediation
Choosing the right cleaner makes a big difference when you are removing mold. In this guide, we explain popular cleaning options, their benefits and drawbacks, and how to mix them safely at home.
When you mix bleach with water at a ratio of one part bleach to three parts water, it works fast on hard surfaces like tiles or countertops. However, the chemicals in bleach can be harmful if you do not use gloves or proper ventilation, and they might also damage delicate items. On the other hand, pure white vinegar is a safer choice. Vinegar cleans more slowly but is gentler on most surfaces. One homeowner mentioned that using vinegar felt less harsh, even though it took a bit longer to see results.
A 3% hydrogen peroxide solution is another good option. It kills mold effectively without the harsh side effects of bleach. You can also try a mix of water and baking soda if you prefer an eco-friendly method. Some people add a few drops of tea tree oil (an oil known to fight germs) to this mix for extra mold-fighting power, despite the extra cost. It all comes down to finding the right balance between cost and performance.
It is important to let the cleaning solution sit on the moldy area for 10 to 15 minutes. This gives the cleaner time to work and break down the mold, making it easier to scrub away afterward. Always test a small spot first to make sure the solution does not harm your surfaces and adjust your method based on how severe the mold is.
Surface-Specific DIY Mold Removal Techniques
This guide helps you clean the most common mold spots in your home. We focus on concrete walls, wood surfaces, and bathroom ceilings. Each surface needs a different cleaning method to remove mold without causing extra damage.
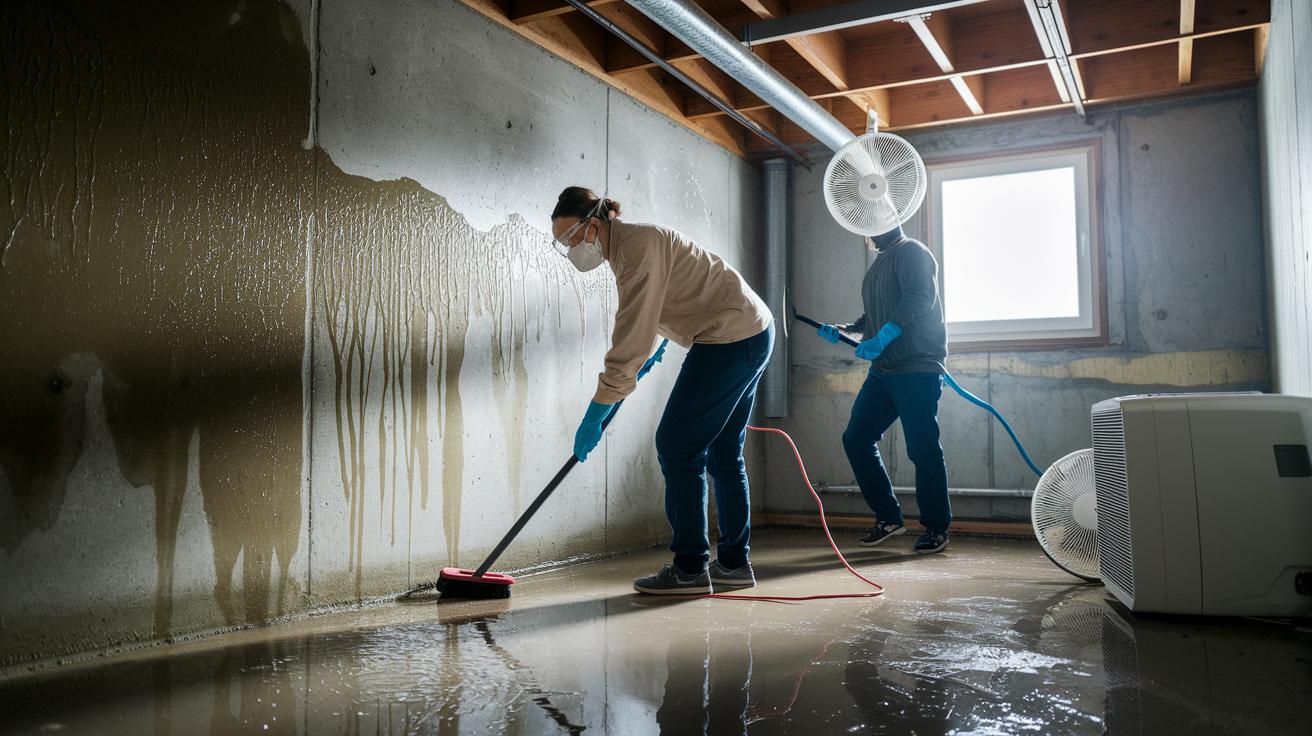
Concrete Walls:
Before you begin, put on gloves, goggles, and a mask. Mix a cleaning solution and use a stiff brush to scrub the mold off the wall. Rinse well with clean water to remove any residue. After rinsing, use fans or a dehumidifier to dry the area and apply a mold inhibitor to prevent future growth.
Wood Surfaces:
When working with wood, handle with care. Start by using a HEPA vacuum (a tool that traps tiny particles) to remove loose mold spores. Then, clean the wood with a dish-soap solution so you do not over-wet the material. If there are stubborn mold stains, lightly sand the area with 100-grit sandpaper. This gentle process cleans the wood while keeping it intact.
Bathroom Ceilings:
Bathroom ceilings can get moldy because of high moisture. Prepare a mix by combining one part bleach with three parts water, or use borax or vinegar for a gentler option. Apply the solution evenly over the affected area and let it sit for 10 to 15 minutes. Next, scrub the ceiling, rinse with clean water, and dry it completely with proper ventilation or fans.
| Surface | Cleaning Solution & Ratio | Contact Time | Tools & Drying Method |
|---|---|---|---|
| Concrete Walls | Cleaning solution then mold inhibitor | N/A | Stiff brush; rinse; fans/dehumidifier |
| Wood Surfaces | Dish-soap solution | N/A | HEPA vacuum; 100-grit sandpaper if needed |
| Bathroom Ceilings | 1:3 Bleach mix (or borax/vinegar) | 10-15 minutes | Scrub; rinse; dry with ventilation |
Preventing Mold Regrowth & Moisture Control after DIY Mold Remediation
Mold only comes back if moisture sticks around. Fix leaks and damp spots right away. Stopping water intrusion is the first step to keeping your home safe.
Keep an eye on everyday moisture. Use a dehumidifier and keep air moving through your home to stay below 50% humidity. In kitchens and bathrooms, turn on exhaust fans to push out excess moisture. Wipe down surfaces when you see spills or condensation, and a quick open window on a dry day can help lower humidity too.
Watch for changes with the seasons. In humid months, boost ventilation and use dehumidifiers more often to tackle rising moisture. In cold weather, even if air is dry, cold surfaces can develop condensation. Check these spots and dry them thoroughly. A well-ventilated attic or basement also helps keep moisture under control over time.
Regularly inspect your home for early signs of dampness. Look near windows, roofs, and plumbing for leaks, and fix any issues quickly to keep mold from returning.
Advanced Air Quality & Long-Term DIY Mold Remediation Strategies
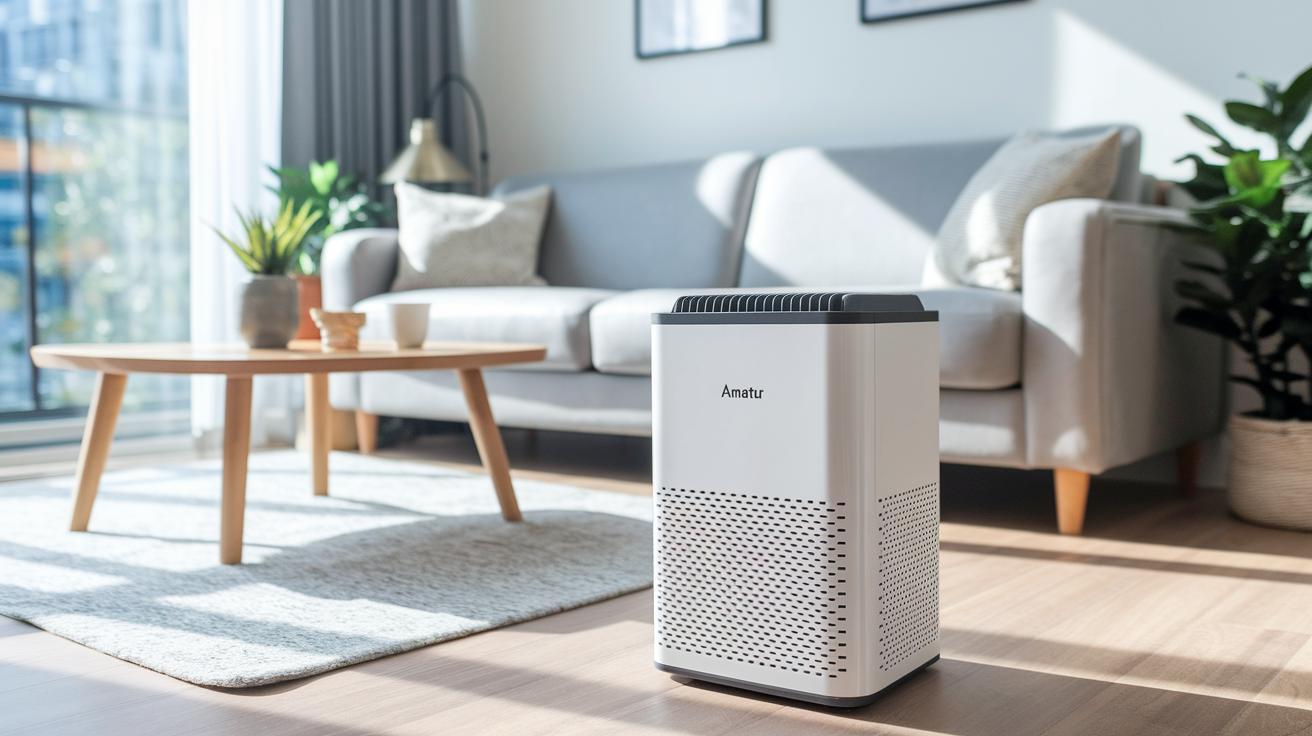
Stand-alone HEPA air purifiers offer a clever way to reduce mold spores in the air. They work by filtering out tiny particles (including spores) so that your indoor air stays clean during cleanup and afterward. These devices run continuously and trap particles as small as 0.3 microns, which boosts overall air quality.
Updating your HVAC filters is another important step to stop mold spores from circulating. A high-efficiency filter catches more contaminants and lightens the load on your system. This simple change can noticeably improve both the air quality and the comfort in your home.
Using an antifungal surface coating provides a long-term defense against mold growth. These treatments form a protective layer over walls and ceilings, making it harder for mold to thrive. Some coatings even include natural ingredients (botanical inhibitors) that help fight mold over time.
Regular environmental testing and routine inspections are key to spotting any new mold early. By staying on top of these checks, you can adjust your approach as needed and maintain a healthier living space.
Budget Planning & Professional Intervention for DIY Mold Remediation Projects
When handling mold cleanup on your own, expenses and challenges can vary a lot. Planning your costs carefully helps you stay on budget while effectively removing the mold.
Budget Planning & Cost Estimates
When you tackle mold on wooden surfaces, supplies are usually very affordable. Many homeowners spend between $0 and $15 for cleaning solutions, gloves, brushes, and other materials. Often, costs are estimated per square foot, which helps you plan your total expense. For areas smaller than 10 square feet, basic supplies usually do the job. Larger areas, however, need more materials and extra time. Compare these costs with what professionals might charge to decide if a DIY approach is right for you. Each supply item you buy is part of your plan to stop the mold from spreading and to avoid bigger repair bills later.
Professional Remediation: When to Hire
There are times when calling in experts is the safest choice. If you have mold covering more than 10 square feet or you see signs of toxic black mold, it is best to call professionals. Toxic black mold produces harmful chemicals (mycotoxins) that can pose health risks and cause structural damage. In these cases, professionals can help avoid long-term issues and expensive repairs. They also make sure every step meets industry standards. For trusted expert help, consider reaching out to disaster recovery restoration services at https://mindtangle.net?p=78.
diy mold remediation: Bright, Easy Home Fixes
Start your small mold cleanup with a clear plan that covers all the basics. First, locate the moisture problem and fix it to keep mold from coming back. Then, clear the area to stop spores from spreading. Pick a cleaning solution that fits your needs. You can use a bleach mix (at a 1:3 ratio) or undiluted white vinegar for a gentler clean. Always test the cleaner on a small spot to be sure it won't harm the surface.
Once the cleaner is on, scrub the mold to break it up. Rinse off the solution and dry the area quickly with a fan or dehumidifier to stop new mold from forming. Keep the space ventilated to lower moisture levels.
Tip: Try other cleaning options from what you have at home. This approach keeps the process simple, safe, and effective.
Final Words
in the action, we covered each essential step, from identifying moisture sources and applying safety measures to choosing the right cleaning solutions and tailored surface techniques. We also touched on preventing regrowth with proper moisture control and planning budgets with a clear view of DIY versus professional options. By following these step-by-step cleanup methods, you’re well-equipped to tackle diy mold remediation safely and effectively. Stay focused, take it one step at a time, and remember that each action brings you closer to a mold-free, restored home.
FAQ
How do I perform DIY mold remediation on walls and drywall?
DIY mold remediation on walls and drywall involves identifying the source, isolating the area, cleaning with a mold-killing solution, scrubbing, rinsing, and ensuring thorough drying to prevent mold regrowth.
How can I approach DIY mold remediation in basements and attics?
DIY mold remediation in basements and attics requires safe practices, removal of moisture sources, cleaning surfaces with effective solutions, and proper ventilation and drying to minimize future mold growth.
What is the role of baking soda in DIY mold remediation?
DIY mold remediation with baking soda uses a mix of baking soda and water to gently clean surfaces, neutralize mold, and help prevent its return on nonporous areas.
Can you remediate mold by yourself?
Remediating mold yourself is feasible for small areas when you use proper safety gear and techniques; however, professional intervention is safer for extensive or toxic mold issues.
What kills mold permanently in a house?
Permanently killing mold in a house involves removing moisture, cleaning with solutions like vinegar or hydrogen peroxide, and thoroughly drying the area to keep mold from returning.
What is the best DIY mold killer?
The best DIY mold killer often depends on the surface; hydrogen peroxide and white vinegar are popular choices that, when used with proper cleaning methods, effectively reduce mold.
What do DIY mold remediation discussions on Reddit suggest?
DIY mold remediation discussions on Reddit suggest using common household items like vinegar and baking soda along with protective gear and proper ventilation to safely tackle small mold problems.
What plant removes 78% of airborne mold?
The snake plant is noted for removing 78% of airborne mold, as it naturally filters indoor air and helps reduce the concentration of mold spores when kept healthy.
What is water damage mold remediation?
Water damage mold remediation involves removing standing water, drying the area, cleaning with approved solutions, and repairing leaks to prevent further mold development after water incidents.
What do mold remediation companies do?
Mold remediation companies detect mold sources, safely remove contaminated materials, treat and inhibit mold growth, and restore affected areas using industry-standard practices.
How much does air duct mold removal cost?
Air duct mold removal cost varies by system size and contamination level; generally, it covers cleaning, disinfecting, and sometimes duct replacement to improve indoor air quality.
How do I find black mold removal near me?
To find black mold removal near you, search local remediation services, read reviews, and verify certifications to ensure experts safely handle toxic molds.
What is black mold remediation?
Black mold remediation refers to the safe removal and treatment of toxic mold, using advanced cleaning methods and protective measures to reduce health risks and property damage.
Where can I find DIY mold remediation supplies, such as those at Home Depot?
DIY mold remediation supplies are available at retailers like Home Depot, where you can purchase cleaning agents, protective gear, and dehumidifiers to effectively address minor mold issues.

